This may take a moment to load, there are many pictures... All pictures are copyrighted MMPT 2002
Things to know:
The only lubricant Tippmann recommends using in their markers is Hoppe's #9 gun oil. This would be why it comes with every marker. Just as a side note, Hoppe's also makes a paintball kit.
Tippmann DOES recommend running a VERY small amount through the air chambers. To learn how to do this look here.
Breakdown/cleaning instructions:
1. Remove your hopper and tank, of course.
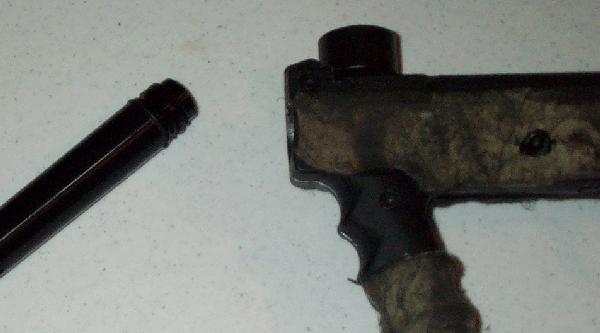
2. Remove your barrel.
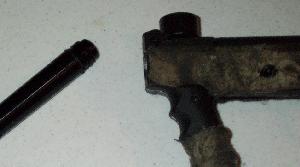
3. Remove your feed elbow.
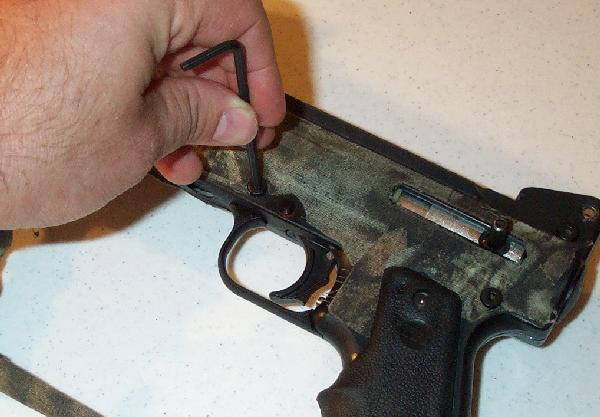
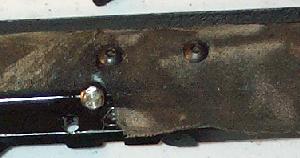
4. Loosen (DO NOT REMOVE) the two tank adapter bolts.
5. Remove the remaining 6 bolts (marked 1-6 on this pic)
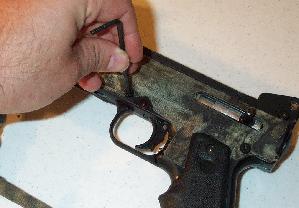
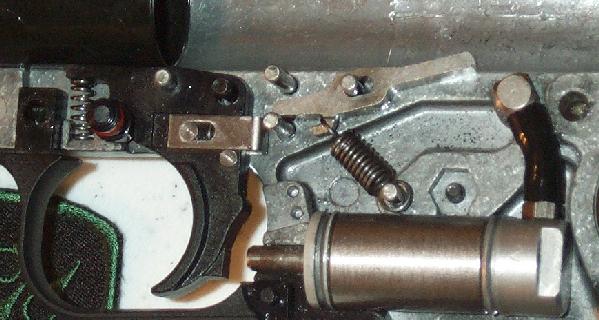
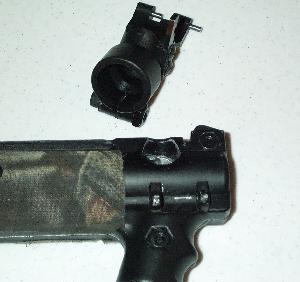
6. Lift off the top half of the body. Note: there's less pressure on the trigger spring pins if you lift it off while it is cocked, however you must be very careful not to pull the rear block out when you lift off the top half. Also be aware of the small parts like the front sight spring!
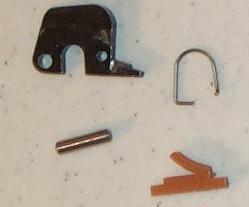
7. Remove the front sight/feed elbow latch and the ball latch. Be very careful no to loose the famous Tippmann $5 spring! It's an easy one to lose since it is under pressure when you take the halves apart.
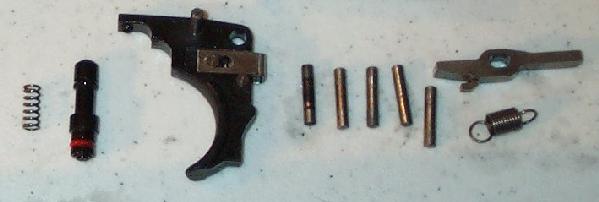
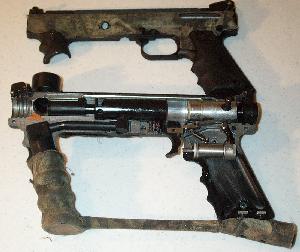
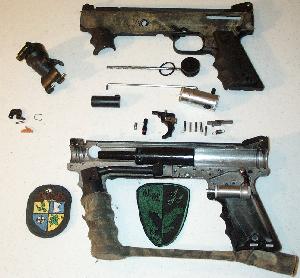
8. You can now remove the striker, trigger, all of the pins, the sear, the linkage arm and the bolt.
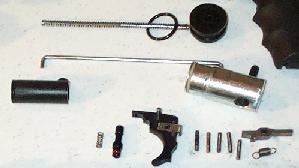
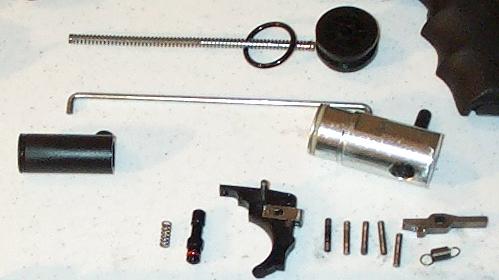
9. This is your marker fully disassembled. Note: I do not recommend removing the valve assembly (power tube) unless it is of dire need. the bolts are easy to strip in reassembly.
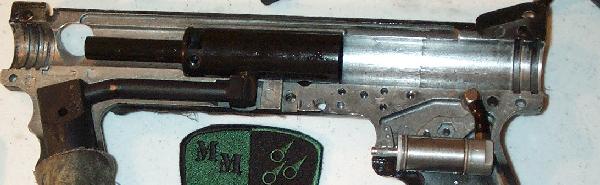
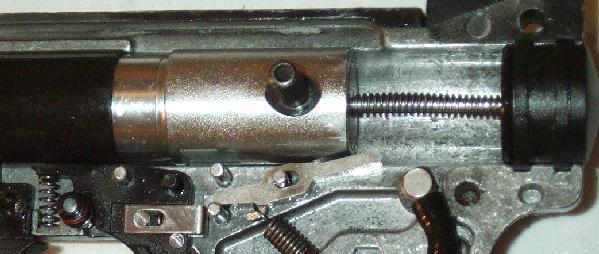
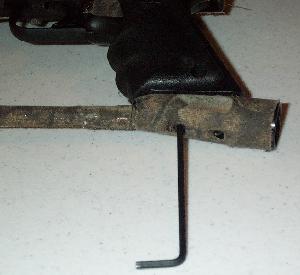
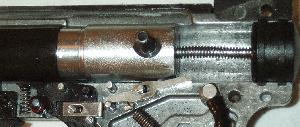
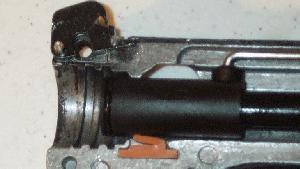
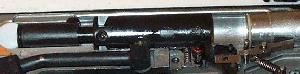
10. If you are in need of removing the valve, remove the two power tube screws pictured here.
11. After removal of the two screws, the power tube along with the vertical adapter (if you have one) will lift out easily. NOTE! If you have an R/T installed you must also remove the microline inlet pictured above, right below the left power tube screw.
12. Clean your marker thoroughly!
Don't leave any paint in the bolt or striker area.
Use a damp paper towel to remove any paint.
Make sure you dry the parts off well to prevent rust of steel parts like the screws and trigger components.
After the marker is cleaned and dry, a few drops of oil in the striker area and the striker O-ring are all you really need in the valve area.
Do not oil the chamber! Oil in the chamber causes breaks and inconsistency.
It should look like this when it's all cleaned up.
13. Clean the trigger components. Remove old oil and any residue that may be building up
14. Reassemble the trigger components. After you have them in place use a small drop of oil on each of the pins to keep them free moving and rust free.

15. Use a couple of drops of oil in both halves of the body in the striker area and then replace the striker (rear bolt), end block, drive spring, guide pin and O-ring.
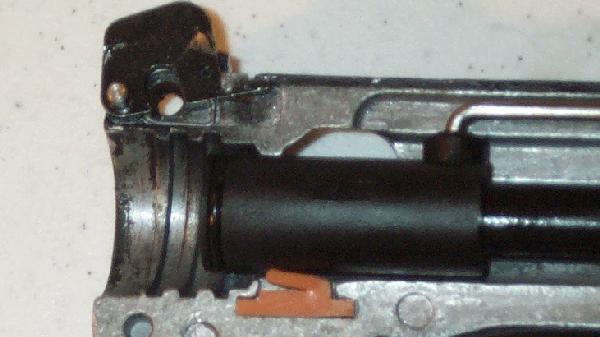
16. Replace the front bolt, linkage arm, the front sight spring, the front sight, and the ball latch. Note: make sure to put the ball latch in correctly as shown.
17. Your marker is now ready to reassemble. It should look like this.
Notes: Kinda looks like it did when you took it apart, huh?
Again, it tends to be easier to get the two halves together when the bolt is cocked back as it relieves the pressure on the sear spring and pin.
Make sure the pins are seated firmly. If they are not, you will not be able to align them to get the halves together.
Seat the trigger guard and safety on the bottom half not the top like it is shown in the picture, that's just how it came apart.
18. Align the two halves and press them together. If they don't slide right together, just wiggle them back and forth a bit. If the pins are not perfect, they will hang on the top piece, thus keeping the pieces from dropping right into place.
19. Retighten all screws, tighten the tank adapter bolts last.
20. Put your feed elbow back on, and your ready to go!
That wasn't so hard, was it!?!?!